Cài đặt LDAP trên CentOS 7
Cấu hình đề nghị
- Hệ điều hành: CentOS 7
- RAM: 1 GB
- CPU: 1 Core
- Disk: 15 GB
Bước 1: Cấu hình OS trước khi tiến hành cài đặt
Cấu hình hostname
hostnamectl set-hostname "LDAP"exec bash |
Tắt firewalld
systemctl stop firewalldsystemctl disable firewalld |
Tắt Selinux
sudo setenforce 0sed -i 's/SELINUX=enforcing/SELINUX=disabled/g' /etc/sysconfig/selinuxsed -i 's/SELINUX=permissive/SELINUX=disabled/g' /etc/sysconfig/selinuxsed -i 's/SELINUX=enforcing/SELINUX=disabled/g' /etc/selinux/configsed -i 's/SELINUX=permissive/SELINUX=disabled/g' /etc/selinux/config |
Cài đặt epel-realse và cập nhật các gói phần
yum install epel-release -yyum update -y |
Khởi động lại để lấy lại cấu hình mới nhất
init 6 |
Bước 2: Cài đặt và cấu hình OpenLDAP
Cài đặt OpenLDAP
yum -y install openldap-servers openldap-clients |
Khởi động slapd và cho phép khởi động cùng hệ thống
systemctl start slapdsystemctl enable slapd |
Thiết lập LDAP admin password, tạo mật khẩu
[root@ldap ~]# slappasswdNew password:Re-enter new password:{SSHA}xxxxxxxxxxxxxxxxxxxxxLDAPPASS1 |
Thêm mới file chroot.ldif
cat > chrootpw.ldif << EOF# Chỉ định mật khẩu được tạo ở trên cho phần "olcRootPW"dn: olcDatabase={0}config,cn=configchangetype: modifyadd: olcRootPWolcRootPW: {SSHA}xxxxxxxxxxxxxxxxxxxxxLDAPPASS1EOF |
Chạy lệnh bên dưới để cập nhật thông tin từ file chroot.ldif
ldapadd -Y EXTERNAL -H ldapi:/// -f chrootpw.ldif |
Kết quả

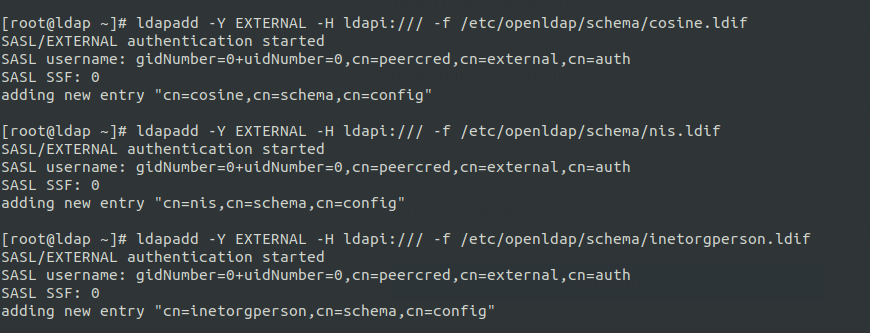
Import các schemas
ldapadd -Y EXTERNAL -H ldapi:/// -f /etc/openldap/schema/cosine.ldifldapadd -Y EXTERNAL -H ldapi:/// -f /etc/openldap/schema/nis.ldifldapadd -Y EXTERNAL -H ldapi:/// -f /etc/openldap/schema/inetorgperson.ldif |
Kết quả
Thiết lập Manager password, tạo mật khẩu
# Tạo mật khẩu cho người quản lý[root@ldap ~]# slappasswdNew password:Re-enter new password:{SSHA}xxxxxxxxxxxxxxxxxxxxxxxxLDAPPASS2 |
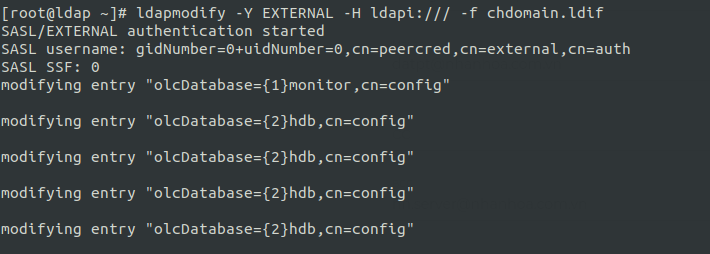
Thêm mới file chdomain.ldif
cat > chdomain.ldif << EOF# Thay thế domain của bạn và các section dc=**,dc=**# Chỉ định mật khẩu vừa được tạo ở trên vào phần "olcRootPW"dn: olcDatabase={1}monitor,cn=configchangetype: modifyreplace: olcAccessolcAccess: {0}to * by dn.base="gidNumber=0+uidNumber=0,cn=peercred,cn=external,cn=auth" read by dn.base="cn=Manager,dc=cloud365,dc=local" read by * nonedn: olcDatabase={2}hdb,cn=configchangetype: modifyreplace: olcSuffixolcSuffix: dc=cloud365,dc=localdn: olcDatabase={2}hdb,cn=configchangetype: modifyreplace: olcRootDNolcRootDN: cn=Manager,dc=cloud365,dc=localdn: olcDatabase={2}hdb,cn=configchangetype: modifyadd: olcRootPWolcRootPW: {SSHA}xxxxxxxxxxxxxxxxxxxxxxxxLDAPPASS2dn: olcDatabase={2}hdb,cn=configchangetype: modifyadd: olcAccessolcAccess: {0}to attrs=userPassword,shadowLastChange by dn="cn=Manager,dc=cloud365,dc=local" write by anonymous auth by self write by * noneolcAccess: {1}to dn.base="" by * readolcAccess: {2}to * by dn="cn=Manager,dc=cloud365,dc=local" write by * readEOF |
Chạy lệnh bên dưới để cập nhật thông tin
ldapmodify -Y EXTERNAL -H ldapi:/// -f chdomain.ldif |
Kết quả
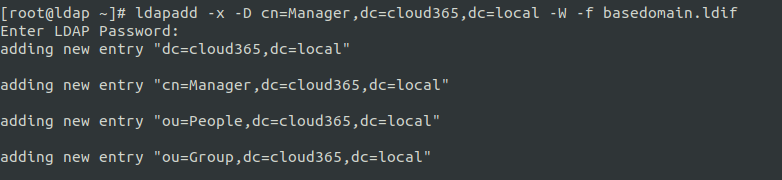
Thêm file basedomain.ldif
cat > basedomain.ldif << EOF# Thay thế domain của bạn và các section dc=**,dc=**dn: dc=cloud365,dc=localobjectClass: topobjectClass: dcObjectobjectclass: organizationo: Cloud365 Localdc: Cloud365dn: cn=Manager,dc=cloud365,dc=localobjectClass: organizationalRolecn: Managerdescription: Directory Managerdn: ou=People,dc=cloud365,dc=localobjectClass: organizationalUnitou: Peopledn: ou=Group,dc=cloud365,dc=localobjectClass: organizationalUnitou: GroupEOF |
Cập nhật thông tin của basedomain
ldapadd -x -D cn=Manager,dc=cloud365,dc=local -W -f basedomain.ldifEnter LDAP Password: # password của manager |
Kết quả
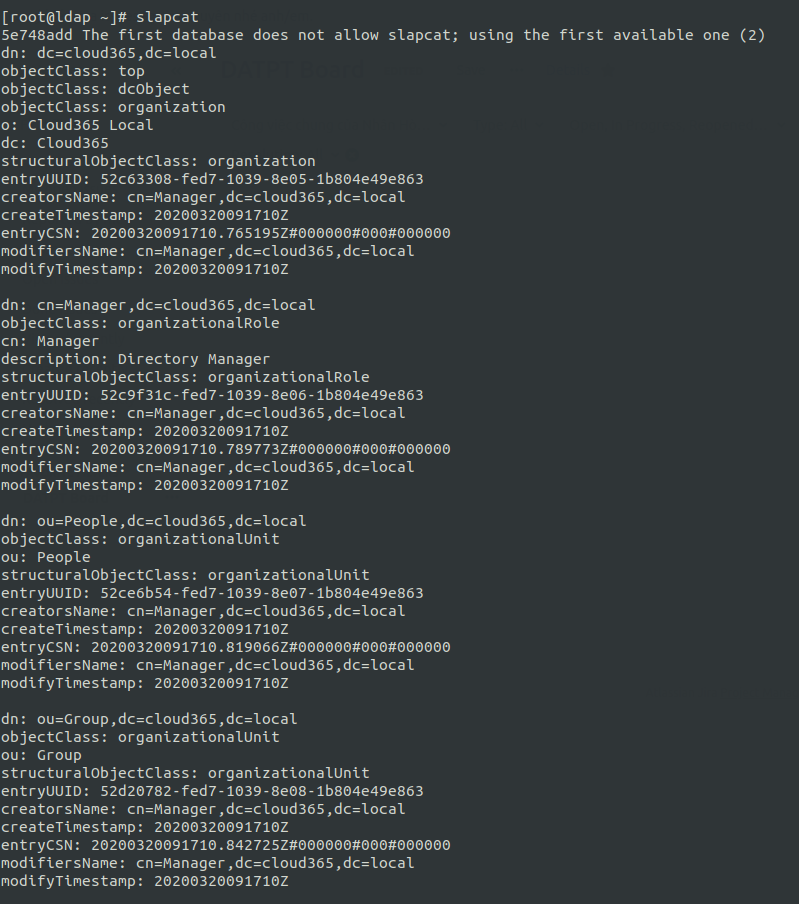
Sau khi thực hiện xong chúng ta thực hiện lệnh sau để kiểm tra các entry
slapcat |
Kết quả
Để thêm mới một entry chúng ta cần tạo ra file ldif và cập nhật thông tin các file ldif đó và dùng slapcat để kiểm tra
Ví dụ về cách thêm mới 1 entry user
cat > adduser_1.ldif << EOFdn: cn=adduser_1,ou=People,dc=cloud365,dc=localobjectClass: personobjectClass: inetOrgPersonuserPassword:: V2VsY29tZTEyMw==sn: usercn: adduser_1EOF |
Cập nhật thông tin file adduser_1.ldif vào cây LDAP chúng ta thực hiện lệnh sau
ldapadd -x -D cn=Manager,dc=cloud365,dc=local -W -f adduser_1.ldif |
Bước 3: Cài đặt PHP LDAP Admin để quản trị LDAP trên giao diện
Cài đặt httpd
yum -y install httpd |
Mở file /etc/httpd/conf/httpd.conf và chỉnh sửa như gợi ý bên dưới
# Tại dòng 151 sửa như sau :AllowOverride All# Tại dòng 164, sửa thông tin như sau:DirectoryIndex index.html index.cgi index.php# Thêm vào cuối file những cấu hình sau:ServerTokens ProdKeepAlive On |
Khởi động lại httpd
systemctl restart httpd |
Cài đặt PHP
yum -y install php php-mbstring php-pear |
Mở file /etc/php.ini và chỉnh sửa theo gợi ý bên dưới
# Tại dòng 878 sửa lại timezone:date.timezone = "Asia/Ho_Chi_Minh" |
Cài đặt PHP LDAP Admin
yum --enablerepo=epel -y install phpldapadmin |
Mở file /etc/phpldapadmin/config.php và chỉnh sửa theo gợi ý bên dưới
# Tại dòng 398:$servers->setValue('login','attr','dn');// $servers->setValue('login','attr','uid'); |
Mở file /etc/httpd/conf.d/phpldapadmin.conf và chỉnh sửa như gợi ý bên dưới
# Tại dòng 11 sửa lại nhưRequire all granted |
Khởi động lại httpd
systemctl restart httpd |
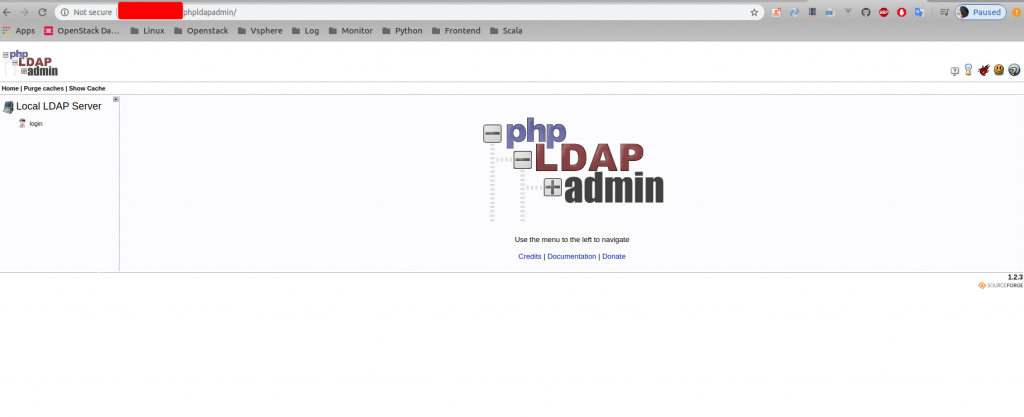
Truy vập vào trang quản trị theo đường dẫn “http://IP_Server/phpldapadmin/”
Kết quả
Tiến hành nhập thông tin đăng nhập
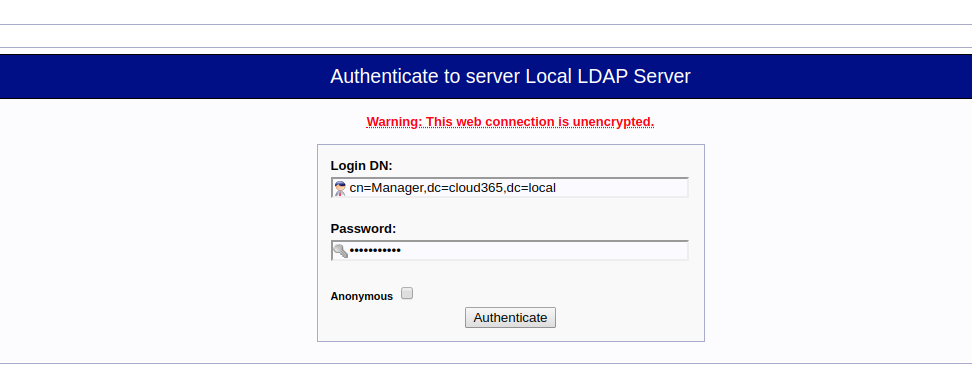
Nếu đúng thông tin sẽ hiển thị như sau

Như thế là đã thành công !!!
Khi cần hỗ trợ xin liên hệ với chúng tôi:
Công ty phần mềm Nhân Hòa