[Rclone] Hướng dẫn đồng bộ dữ liệu Windows lên S3 Nhân Hòa Cloud Storage
Khi đăng ký gói Nhân Hòa Cloud Storage thì quý khách sẽ nhận được email thông tin như sau:
URL: https://console.smartstorage.
Email:*******@********
Password: ****************
Thông tin này dùng để login vào tạo bucket, quản lý file được đồng bộ lên cloud.
ACCESS-KEY:< ACCESS KEY>
SECRET-KEY: <SECRETKEY>
Thông tin ACCESS-KEY, SECRET-KEY dùng để kết nối từ máy Windows lên bucket được tạo trên trang quản lý storage.
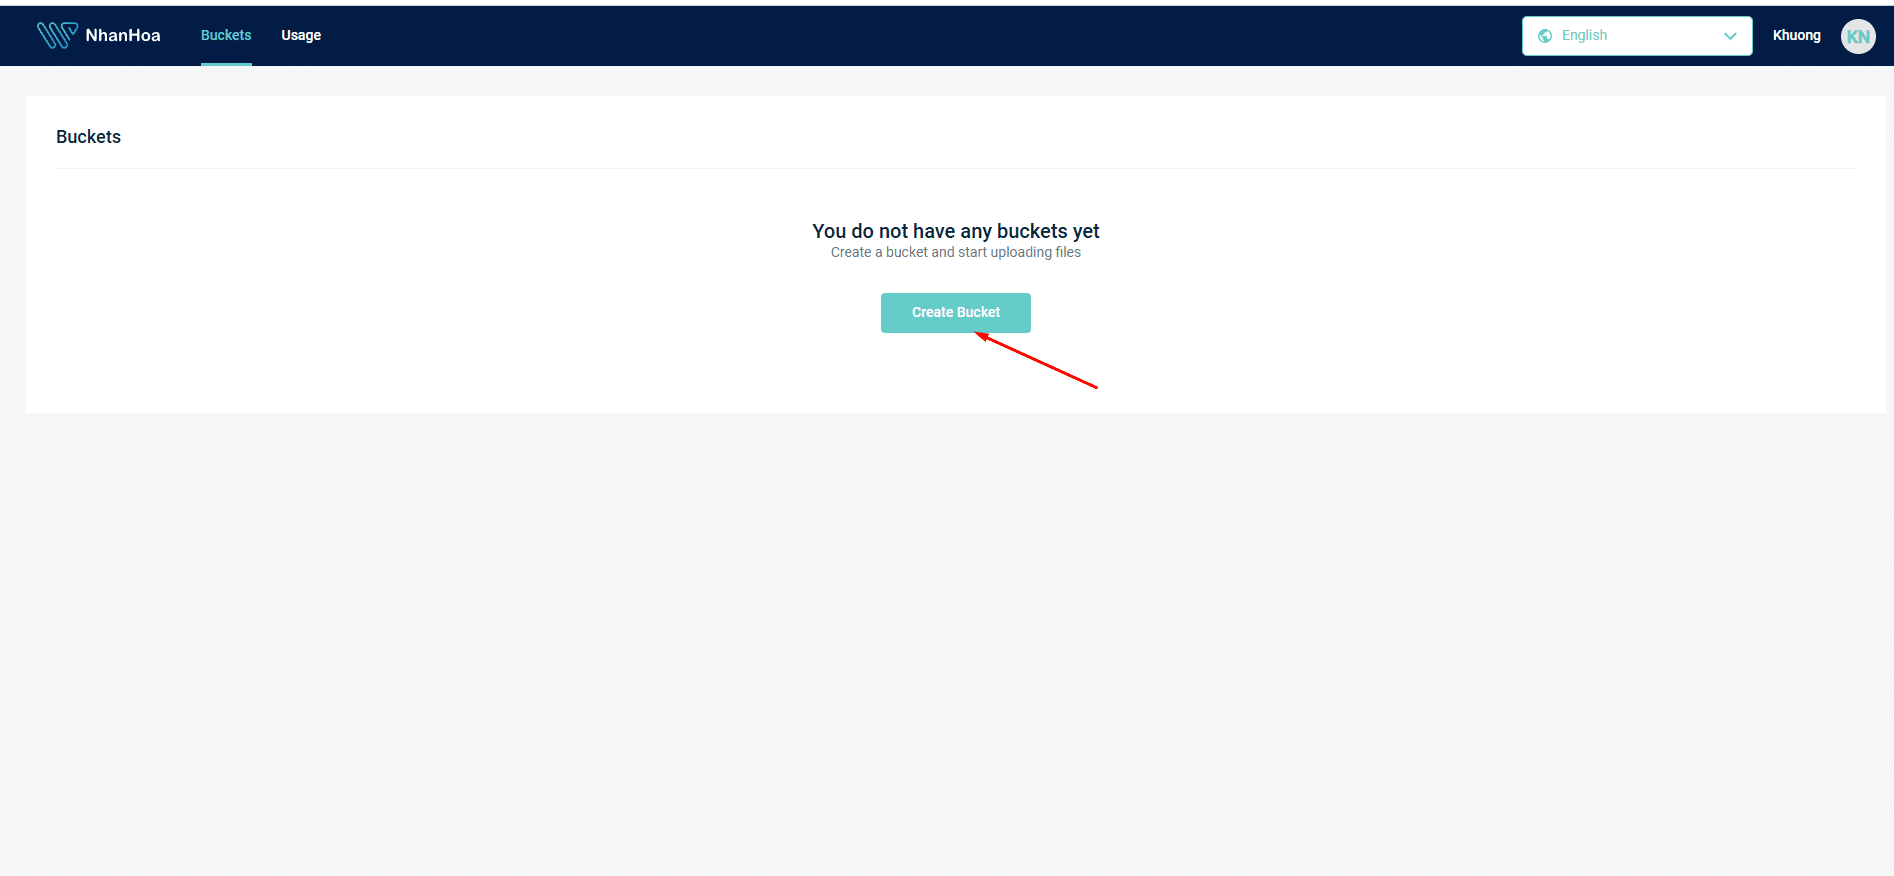
Bước 1: Tạo bucket trên trang quản lý storage.
Đăng nhập vào link https://console.smartstorage.cloud sau đó bấm Create Bucket
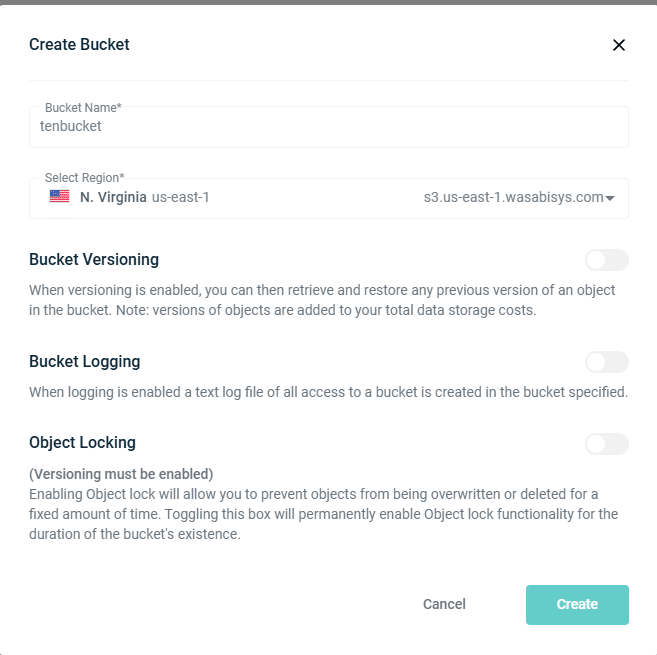
Tại Bucket Name: Đặt tên cần tạo, không khoảng cách, không viết hoa, không có dấu.
Select Region: Chọn region cần dùng và ghi nhớ thông tin region để tí kết nối trên Windows.
Bấm Create.
Bước 2: Cài đặt Rclone
Tải Rclone cho Windows tại link: https://rclone.org/downloads/
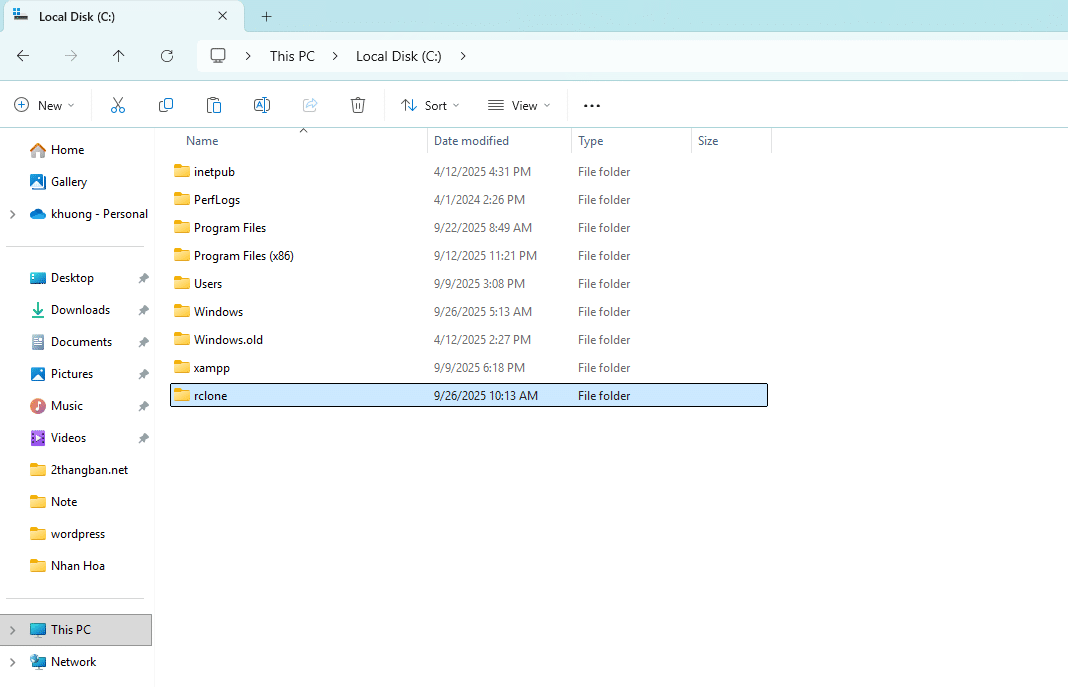
Sau khi download về tiến hành giải nén và đổi tên thư mục thành rclone. Copy thư mục rclone vào ổ C.
Bước 3: Kết nối remote Clone vào bucket vừa tạo.
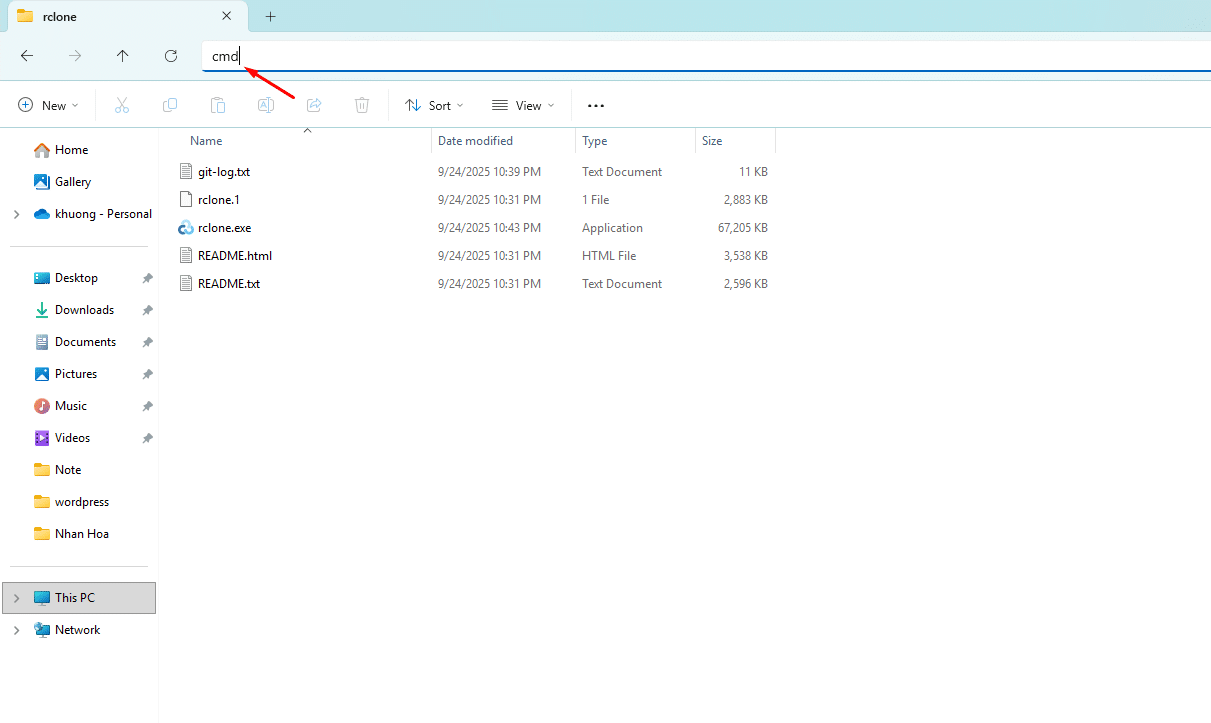
Vào đường dẫn C:\rclone vừa copy ở trên nhập vào đường dẫn: cmd
Gõ vào cmd: rclone config
Sau đó config theo thông tin sau:
C:\rclone>rclone config
2025/09/26 10:31:55 NOTICE: Config file "C:\\Users\\Administrator\\AppData\\Roaming\\rclone\\rclone.conf" not found - using defaults
No remotes found, make a new one?
n) New remote
s) Set configuration password
q) Quit config
n/s/q> n
Enter name for new remote.
name> tenremote # chỗ này đặt tên remote clone
Option Storage.
Type of storage to configure.
Choose a number from below, or type in your own value.
………..
4 / Amazon S3 Compliant Storage Providers including AWS, Alibaba, ArvanCloud, Ceph, ChinaMobile, Cloudflare, DigitalOcean, Dreamhost, Exaba, FlashBlade, GCS, HuaweiOBS, IBMCOS, IDrive, IONOS, LyveCloud, Leviia, Liara, Linode, Magalu, Mega, Minio, Netease, Outscale, OVHcloud, Petabox, RackCorp, Rclone, Scaleway, SeaweedFS, Selectel, StackPath, Storj, Synology, TencentCOS, Wasabi, Qiniu, Zata and others
\ (s3)
……..
Storage> 4
Option provider.
Choose your S3 provider.
Choose a number from below, or type in your own value.
Press Enter to leave empty.
………
36 / Wasabi Object Storage
\ (Wasabi)
………
provider> 36 Chỗ này số thứ tự có thể thay đổi nên chỉ cần nhập đúng số đang có Wasabi Object Storage là được.
Option env_auth.
Get AWS credentials from runtime (environment variables or EC2/ECS meta data if no env vars).
Only applies if access_key_id and secret_access_key is blank.
Choose a number from below, or type in your own boolean value (true or false).
Press Enter for the default (false).
1 / Enter AWS credentials in the next step.
\ (false)
2 / Get AWS credentials from the environment (env vars or IAM).
\ (true)
env_auth> 1
Option access_key_id.
AWS Access Key ID.
Leave blank for anonymous access or runtime credentials.
Enter a value. Press Enter to leave empty.
access_key_id> < ACCESS KEY> điền access key trong mail thông tin gửi
Option secret_access_key.
AWS Secret Access Key (password).
Leave blank for anonymous access or runtime credentials.
Enter a value. Press Enter to leave empty.
secret_access_key> <SECRETKEY> điền secret key trong mail thông tin gửi
Option region.
Region to connect to.
Leave blank if you are using an S3 clone and you don’t have a region.
Choose a number from below, or type in your own value.
Press Enter to leave empty.
/ Use this if unsure.
1 | Will use v4 signatures and an empty region.
\ ()
/ Use this only if v4 signatures don’t work.
2 | E.g. pre Jewel/v10 CEPH.
\ (other-v2-signature)
region> 1
Option endpoint.
Endpoint for S3 API.
Required when using an S3 clone.
Choose a number from below, or type in your own value.
Press Enter to leave empty.
1 / Wasabi US East 1 (N. Virginia)
\ (s3.wasabisys.com)
2 / Wasabi US East 2 (N. Virginia)
\ (s3.us-east-2.wasabisys.com)
………..
endpoint> 1 chọn region lúc tạo bucket chọn
Option location_constraint.
Location constraint – must be set to match the Region.
Leave blank if not sure. Used when creating buckets only.
Enter a value. Press Enter to leave empty.
location_constraint> enter
Option acl.
Canned ACL used when creating buckets and storing or copying objects.
This ACL is used for creating objects and if bucket_acl isn’t set, for creating buckets too.
For more info visit https://docs.aws.amazon.com/AmazonS3/latest/dev/acl-overview.html#canned-acl
Note that this ACL is applied when server-side copying objects as S3
doesn’t copy the ACL from the source but rather writes a fresh one.
If the acl is an empty string then no X-Amz-Acl: header is added and
the default (private) will be used.
Choose a number from below, or type in your own value.
Press Enter to leave empty.
/ Owner gets FULL_CONTROL.
1 | No one else has access rights (default).
\ (private)
…………….
acl> 1
Edit advanced config?
y) Yes
n) No (default)
y/n> y
Option bucket_acl.
Canned ACL used when creating buckets.
For more info visit https://docs.aws.amazon.com/AmazonS3/latest/dev/acl-overview.html#canned-acl
Note that this ACL is applied when only when creating buckets. If it
isn’t set then “acl” is used instead.
If the “acl” and “bucket_acl” are empty strings then no X-Amz-Acl:
header is added and the default (private) will be used.
Choose a number from below, or type in your own value.
Press Enter to leave empty.
/ Owner gets FULL_CONTROL.
1 | No one else has access rights (default).
\ (private)
/ Owner gets FULL_CONTROL.
2 | The AllUsers group gets READ access.
\ (public-read)
/ Owner gets FULL_CONTROL.
3 | The AllUsers group gets READ and WRITE access.
| Granting this on a bucket is generally not recommended.
\ (public-read-write)
/ Owner gets FULL_CONTROL.
4 | The AuthenticatedUsers group gets READ access.
\ (authenticated-read)
bucket_acl> 1
Option upload_cutoff.
Cutoff for switching to chunked upload.
Any files larger than this will be uploaded in chunks of chunk_size.
The minimum is 0 and the maximum is 5 GiB.
Enter a size with suffix K,M,G,T. Press Enter for the default (200Mi).
upload_cutoff> enter
chunk_size> enter
max_upload_parts> enter
copy_cutoff> enter
disable_checksum> enter
shared_credentials_file> enter
profile> enter
session_token> enter
upload_concurrency> enter
force_path_style> enter
v2_auth> enter
use_dual_stack> enter
use_arn_region> enter
list_chunk> enter
list_version> enter
list_url_encode> enter
no_check_bucket> enter
no_head> enter
no_head_object> enter
encoding> enter
disable_http2> enter
download_url> enter
directory_markers> enter
use_multipart_etag> enter
use_unsigned_payload> enter
use_presigned_request> enter
versions> enter
version_at> enter
version_deleted> enter
decompress> enter
might_gzip> enter
use_accept_encoding_gzip> enter
use_already_exists> enter
use_multipart_uploads> enter
use_x_id> enter
sign_accept_encoding> enter
sdk_log_mode> enter
description> enter
Edit advanced config?
y) Yes
n) No (default)
y/n> n
Configuration complete.
Options:
– type: s3
– provider: Wasabi
– access_key_id: < ACCESS KEY>
– secret_access_key: <SECRETKEY>
– endpoint: s3.wasabisys.com
– acl: private
– bucket_acl: private
Keep this “tenremote” remote?
y) Yes this is OK (default)
e) Edit this remote
d) Delete this remote
y/e/d> y
Current remotes:
Name Type
==== ====
tenremote s3
e) Edit existing remote
n) New remote
d) Delete remote
r) Rename remote
c) Copy remote
s) Set configuration password
q) Quit config
e/n/d/r/c/s/q> q
Bước 4: Kiểm tra kết nối với bucket
Kiểm tra xem máy Windows đã kết nối được với bucket chưa: rclone lsd <tên remote vừa đặt ở trên>:

Nếu thấy được bucket qua lệnh trên có thể bắt đầu chuyển dữ liệu lên: rclone copy C:\data <tên remote>:<tên bucket> -v –log-file=rclone.log
Trong đó:
C:\data: là thư mục cần đồng bộ dữ liệu lên storage
<tên remote>: là tên remote đặt lúc config.
<tên bucket>: là tên bucket đặt trên trang quản lý storage.
rclone.log: ghi lại log quá trình update dữ liệu.

Sau khi chạy đồng bộ xong dữ liệu có thể kiểm tra trên trang storage dữ liệu.
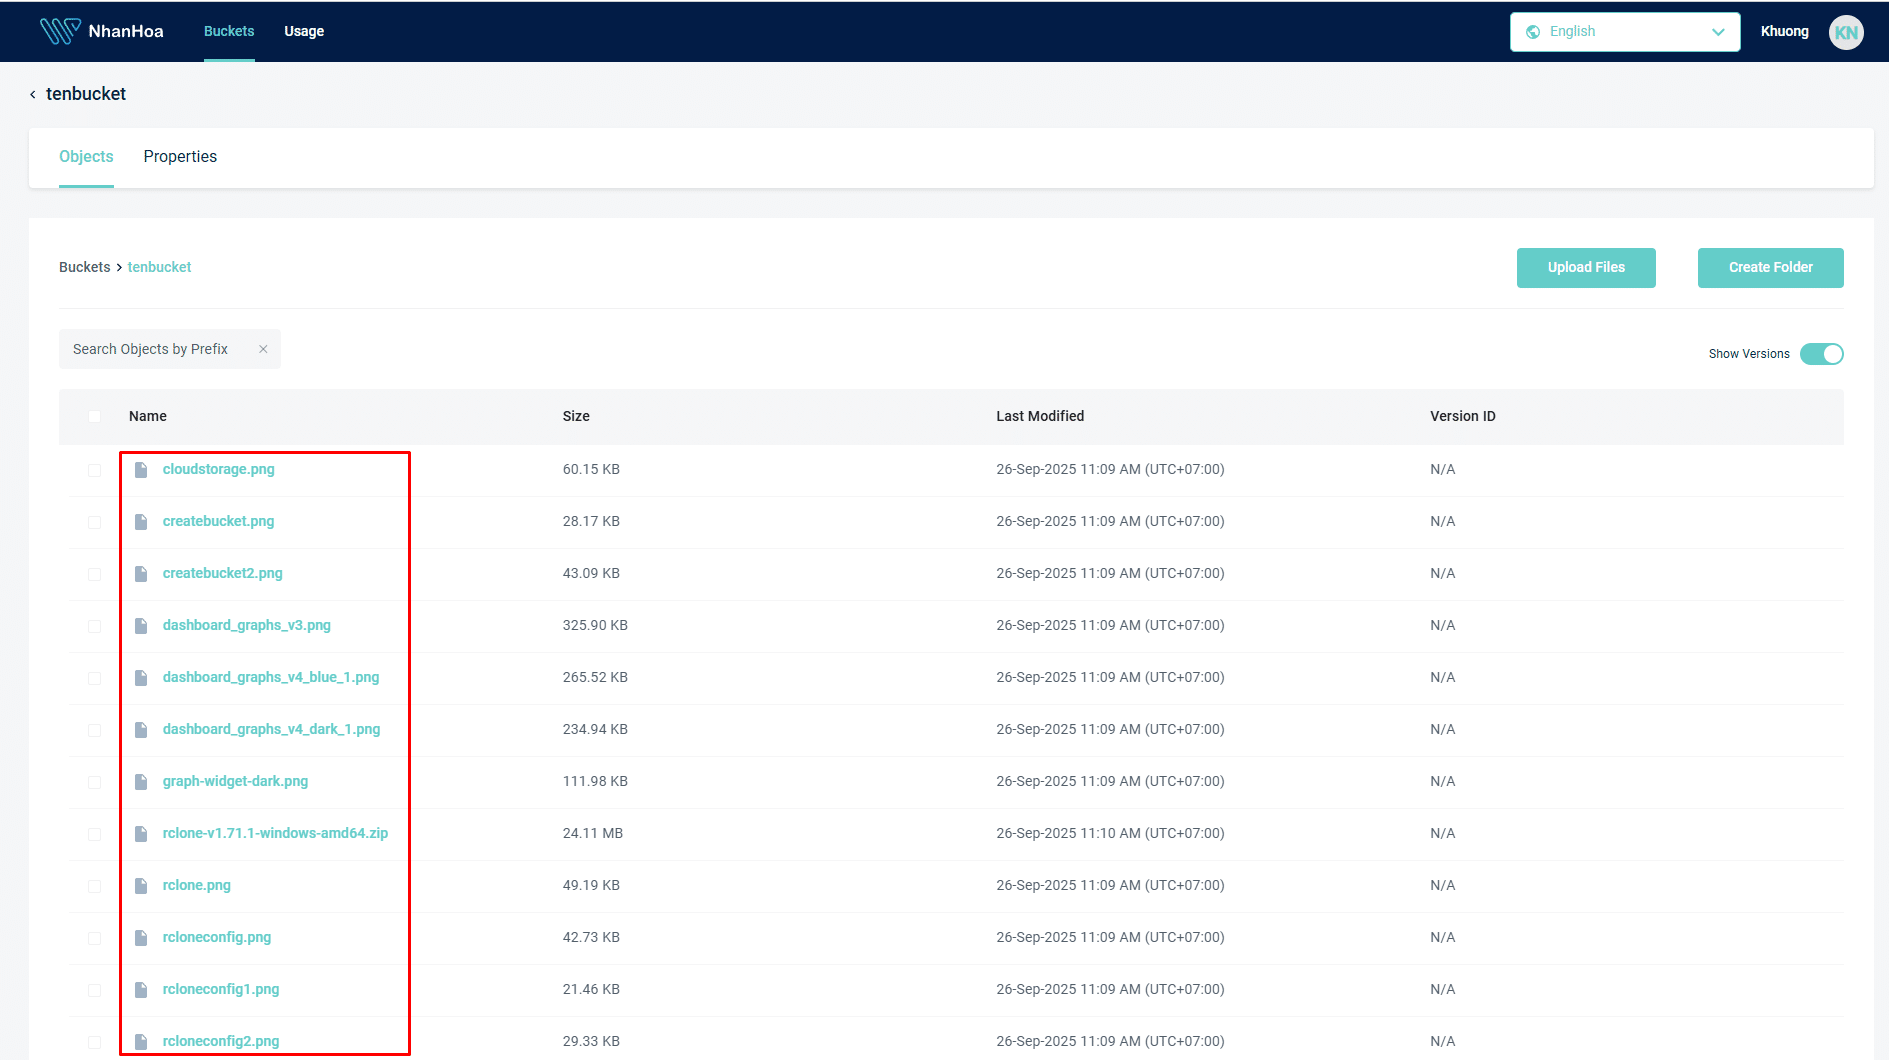
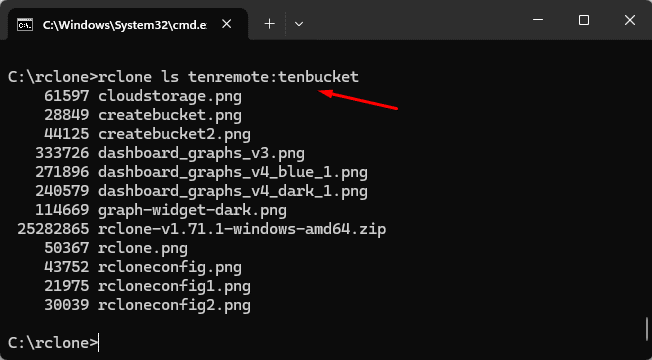
Hoặc có thể dùng lệnh trên cmd để xem.
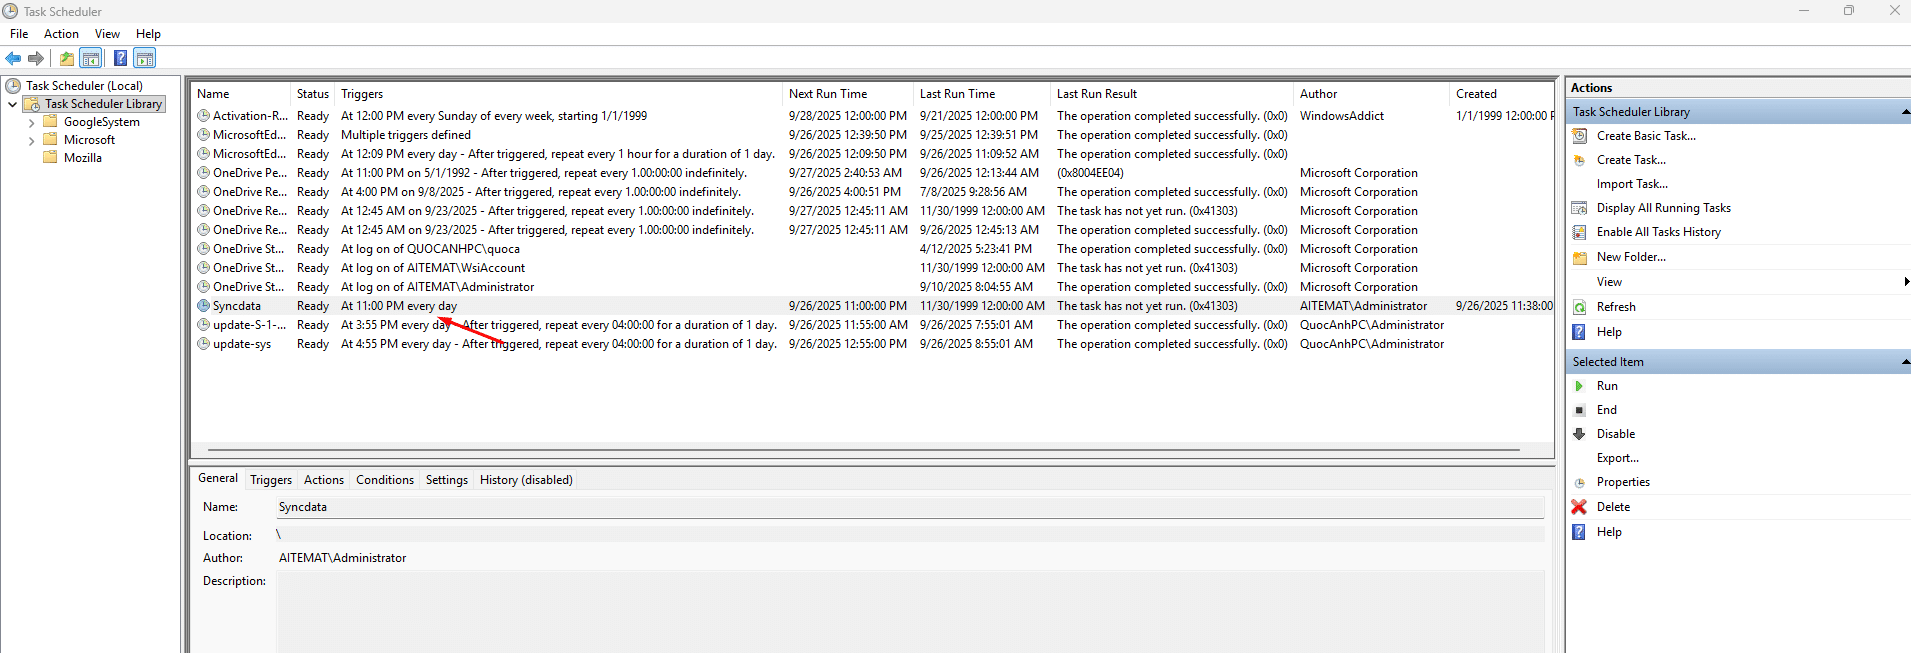
Bước 5: Đặt lịch tự đồng bộ dữ liệu daily.
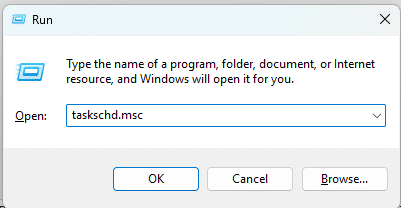
Bấm Windows + R gõ: taskschd.msc
Click vào Task Scheduler Library > Create Task
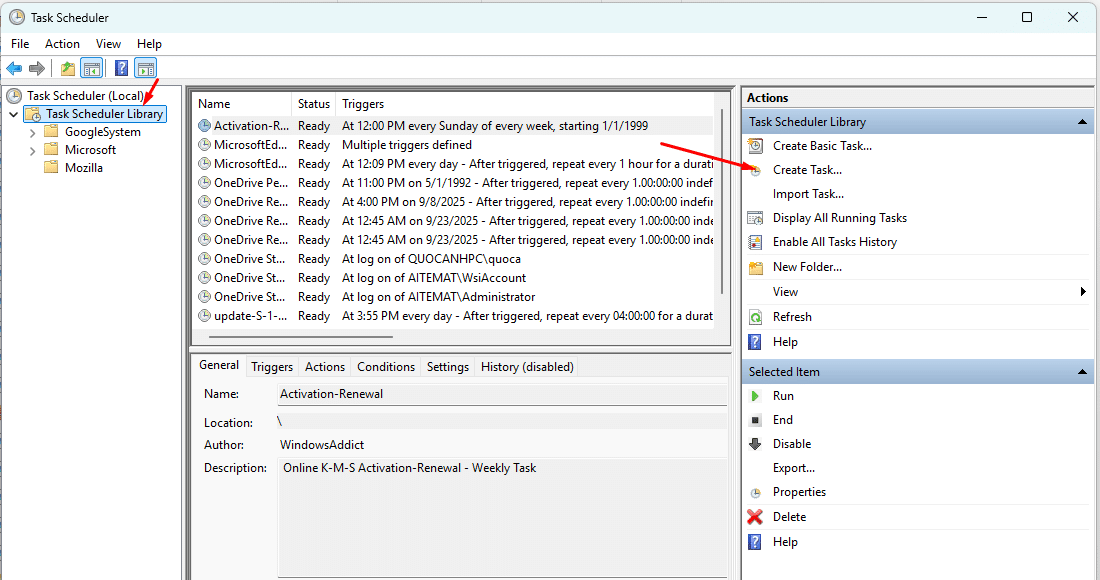
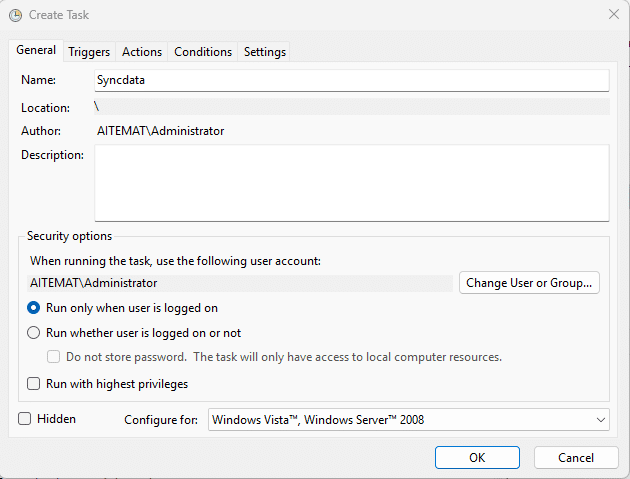
Trong tab “General“, đặt tên và mô tả cho task. Bạn có thể đặt tên là “Syncdata“.
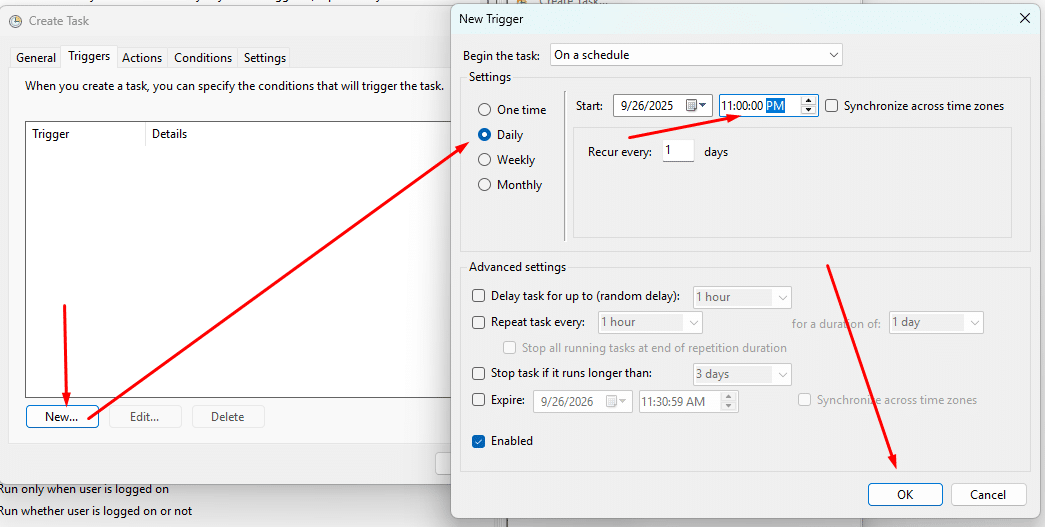
Chuyển sang tab “Triggers” và nhấn “New“.
Chọn “Daily” và đặt thời gian bắt đầu.
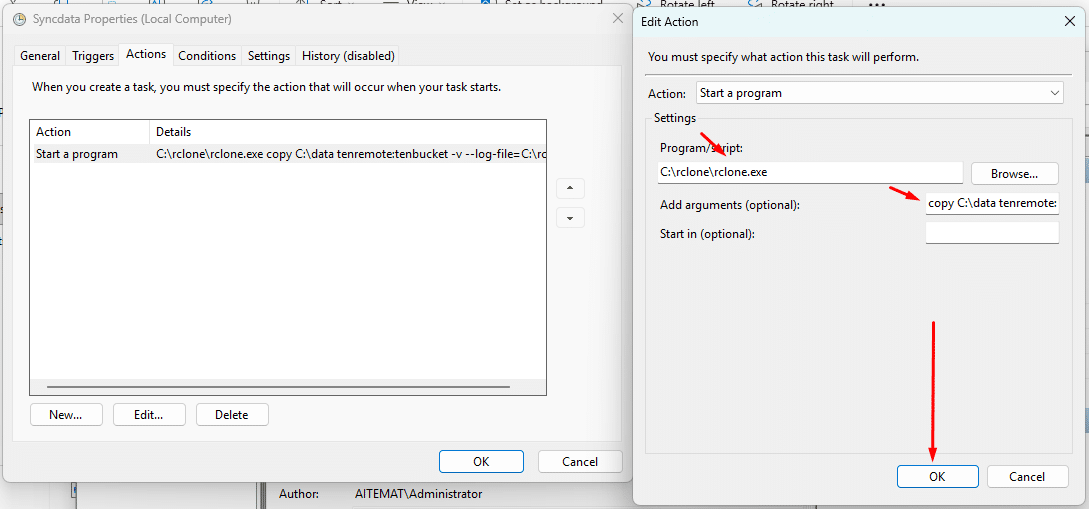
Chuyển sang tab “Actions” và nhấn “New“.
Chọn “Start a program“.
Trong trường “Program/script“, nhập đường dẫn đến folder cài đặt rclone: C:\rclone
Trong trường “Add arguments (optional) “:
copy C:\data tenremote:tenbucket -v –log-file=C:\rclone\rclone.log
Chọn OK.
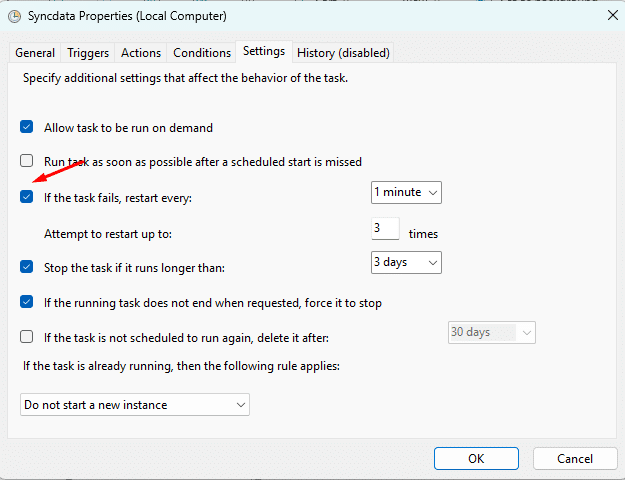
Mục Setting.
Sau khi tạo xong có thể thấy task trong cột status đã Ready.